Updating a Server
Step-by-step guide to updating an XC_VM server. For the internals of the update process, see Update Mechanism.
💾 Before updating, it is recommended to create a backup.
Updating via the Panel
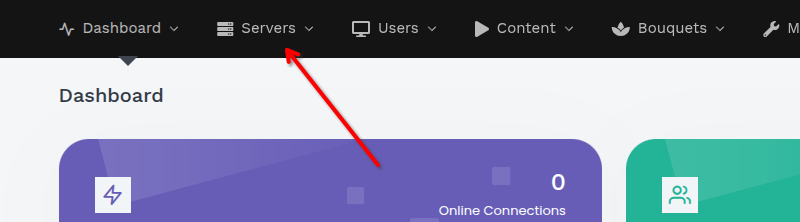
Step 1. Open the Servers section in the top menu of the panel.
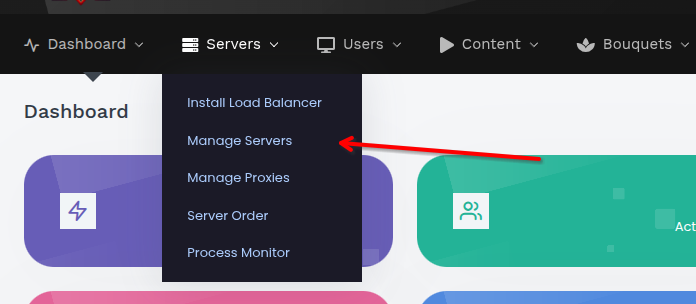
Step 2. Select Manage Servers from the dropdown menu.
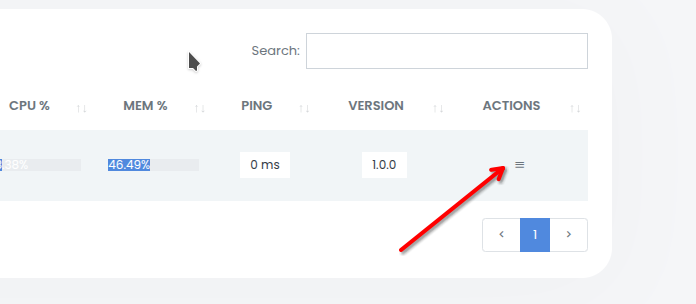
Step 3. Locate the target server in the servers table and click the menu button in the Actions column.
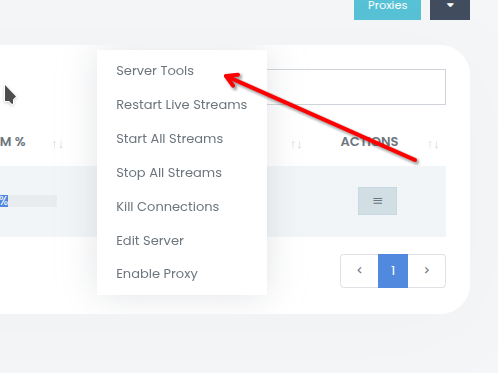
Step 4. Select Server Tools from the menu.
Step 5. In the Server Tools dialog, click Update Server.
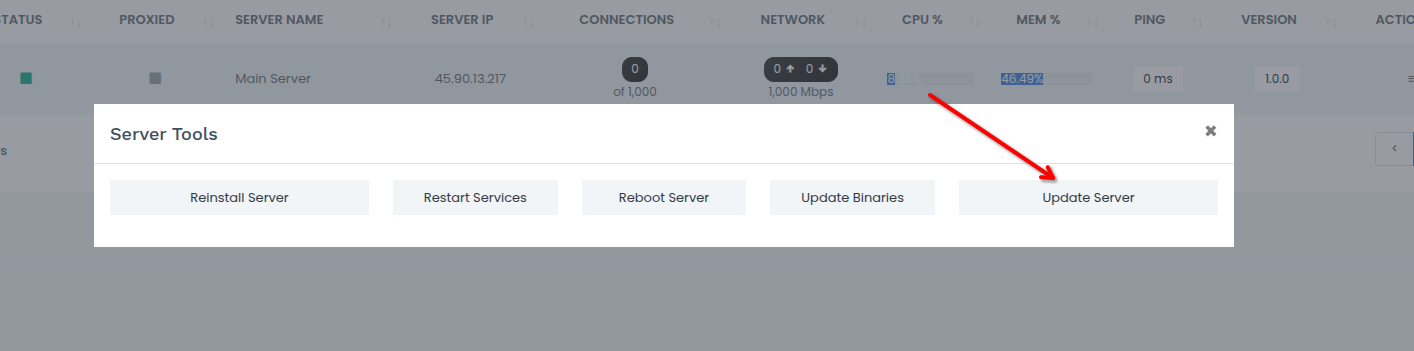
Clicking the button inserts an update signal into the database. Within a minute, CRON picks it up and the update runs automatically: the panel is stopped, updated, and restarted. You can track progress via the server version in the Manage Servers table.
Manual Update (CLI)
Downloads and applies the latest update from GitHub. Usually triggered automatically through the web panel.
Update Channels
Settings → General → Updates sets the release channel for each component. The panel channel also applies to every load balancer.
| Channel | Panel receives |
|---|---|
Stable |
Stable releases only |
Beta |
Stable releases and pre-releases |
Dev (nightly) |
Everything in Beta, plus nightly builds of the main branch (X.Y.Z-dev.N) |
Dev is offered for the panel only. Nightly builds are published to the separate XC_VM_Dev repository, at most once a day and only when main has changed.
⚠️ Nightly builds are untested. Use
Devon test servers only: a nightly may apply a database migration that a later build revises.
To leave Dev, switch the channel back to Stable. A nightly X.Y.Z-dev.N is older than the release X.Y.Z, so the panel updates to that release as soon as it is published. To return to the previous release right away, use a rollback. Nightly builds are never offered as rollback targets.
Rolling Back a Server
If an update introduces a problem, you can roll a server back to an earlier release directly from the panel. Rollback works per-server, so both the MAIN panel and individual Load Balancers can be downgraded independently.
Step 1. Open the Servers section → Manage Servers.
Step 2. Locate the target server and open its Actions menu (the same menu used for updating).
Step 3. Click Rollback Version. A dialog opens listing earlier releases (newest first). Pre-release builds are tagged (beta).
Step 4. Select the version to roll back to and confirm.
Clicking Rollback inserts a rollback signal (carrying the chosen version) into the database. Within a minute CRON picks it up and the rollback runs automatically, reusing the same stop → replace → restart flow as an update. Track progress via the server version in the Manage Servers table.
💾 On the MAIN server a database backup is taken automatically before the rollback, saved to
/home/xc_vm/backups/pre_rollback_<from>_to_<to>_<timestamp>.sql. Load balancers have no database, so this step is skipped.
The versions offered depend on the server's update channel: on the stable channel only stable releases are listed; on beta and dev you also see (beta) pre-releases.
⚠️ A rollback does not undo database migrations — they are forward-only. The schema is designed to stay backward-compatible, and the automatic backup is the recovery path if an older build cannot read newer data. Use rollback only as a recovery step.
Manual Rollback (CLI)
Downloads the specified release from GitHub and applies it, with the same integrity checks and — on MAIN — the automatic database backup.